Tuesday, September 22, 2015

Ponchos for Men -- YEA or NAY?


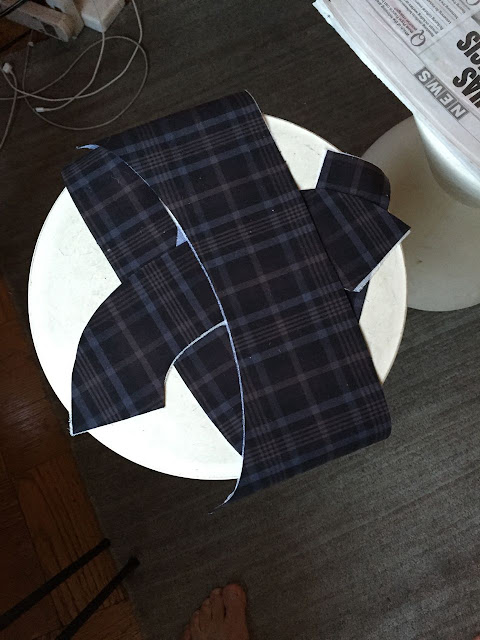
Readers, I have never been a fan of the poncho.

I remember ponchos as a 70's fad.  They looked a lot like the patterns below, which, along with Nehru jackets, were about as counterculture as the Big 4 pattern companies ever got.  Naturally, given the times, many of these poncho patterns were unisex.  In those days, if you really loved each other, you wore the same clothes.


Today, ponchos are generally made for rain protection or to stay warm at the stadium: one step up from a Snuggie, but only just.

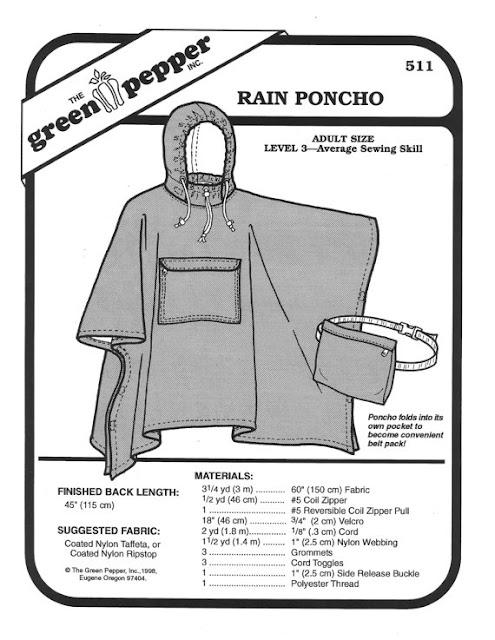
Is that a poncho in your pouch or are you just glad to see me?


But wait -- are you sitting down?

I ask, because it seems that designers are pushing ponchos (and their near-identical cousins, the cape and sofa throw shawl) as fashion once again.

Why now, I wonder.  Why at all?


Readers, I ask you: are ponchos to be avoided, or are these fabric hogs something you want to see on the man you love -- or even on yourself?  Would you ever sew one? 

Are ponchos, ultimately, yet another example of fashion that works only for people who -- let's be real here -- would look good in a tablecloth.  (And in a poncho, they basically do.)

Ponchos for men -- YEA or NAY?

Friday, September 18, 2015

Plaid Overcoat Progress + More Pattern Drafting!


My plaid Burda overcoat is coming along slowly but surely.

On Wednesday I cut my front pockets.  They were supposed to be single welt pockets but due to a slight case of mismeasuring (and consequent cutting) they turned into double welt pockets.  A lucky save.


I'm making keyhole buttonholes myself with my Singer buttonholer (the beige plastic one that uses templates) and have incorporated a hidden button placket, which one often finds on coats like these.  Burda 7780 is a pretty stripped-down coat pattern -- no back vent, only a half lining (I'm adding a full one), and perhaps worst of all, no inside pocket (I'm adding two, for wallet and sunglasses).


As of tonight (Friday) my coat looks like this (below).  I attached the sleeves, the facings are in, and the collar just needs to be topstitched.  I still have to attach my lining pieces and insert them, and then hem the coat and add the buttons.  I hope to finish this sometime next week as I don't expect to be able to sew this weekend.


In other news, I had my patternmaking class again on Wednesday night.  We used the pattern we drafted last week to make a muslin to fit our dress form.  Here's mine: a shapely Size 8.


We then put the pinned muslin on the form and, with the assistance of the professor, corrected any fit issues.  These corrections were transferred to the paper pattern, and the now-corrected pattern was used to trace a master pattern on heavy brown paper.  That's a lot for one night, no?


I am loving this FIT patternmaking class.  The pace is perfect for me: it's fast but not overwhelming, and the professor is very enthusiastic and supportive.

And that's it.

Have a great weekend, everybody, and tune in next week for further coat updates!

My client, blue-eyed Ephraim, picked up his shirt this week.  It looks lovely on him.

Tuesday, September 15, 2015

Remaking a Coat Pattern from Six Years Ago, et al.


Readers, I don't know how I managed it, but six years ago, with little more than two months' sewing experience under my belt, I made Burda 7780 (above).  It turned out pretty nice, especially from a distance.


I made it with cheap fabric, however, and it didn't really hold up well over the years; I finally said good-bye to it this summer.  But since I could really use a raincoat-type topper, I'm making Burda 7780 again.  This time I'm using a coated cotton plaid in a rather dark palette.


It wasn't till I started cutting my fabric, however, that I was reminded that this pattern's front and back pieces are slightly curved.  As a result, the back looks like this:


The plaid matches (I used a walking foot with my Singer 201) but there's an unmistakable "V" shape at the center.  That's OK, right?

I've cut all my pieces out (plaid takes a lot time to cut, I was reminded) and interfaced what needs interfacing.  I hope to start putting things together tomorrow (plus double welt pockets; sigh).


In other news, last week I completed a shirt muslin for a client, using a coarse vintage cotton floral I found at the flea market years ago.  It's a pretty print but not very soft.


For the first time, I created a pattern by copying an already-made garment.  I used the method David Coffin recommends in his book, Shirtmaking.  It involves putting pins through the edges of the garment pieces and connecting the pin pricks.


We'll see how it fits in a few weeks.

On an unrelated not, this weekend I draped Michael in blue and patterned shirting I may use to make a shirt for him.  He's a "Light Summer."


On Sunday, we did my friend Johanna's colors.  We say she's an "Autumn."


And that's it!

In closing, have you ever copied a ready-to-wear garment using David Coffin's method or another? What were the results like?

Have a great day, everybody!

Willy sure knows how to charm Grandma!

Sunday, September 13, 2015


Finding a new option for clothing tall men is always a plus. Even more so when it is a business run by tall people for tall people. Enter Plus 2 Clothing.


Plus 2 Clothing is an Australian clothing label that began in 2013 by Josh & Steve, two tall, slim guys who were fed up with how hard it was to find clothing that fit. In their native Australia, it felt that there was a real lack of “fashionable” clothing aimed at taller, slimmer built men under 40.


As Steve tells, it "with this in mind we set about to design our first tall tee. Of course, it took a fair few attempts before we were 100% happy. We paid particular attention to making it a heavyweight pre-shrunk cotton so that it was not only breathable material but also wouldn’t shrink in the wash - if you're a tall bloke there isn’t much worse than your t-shirts shrinking in the wash. We also knew our target market would be mainly people with an athletic/sporty build, so we wanted to make sure that the stitching would hold up when playing sport or working out. We have since created a range of tall hoodies, jackets and are now focusing on tall button-ups and even pants which we hope to launch in the coming months".


Plus 2 Clothing asked taller professional athletes and even Australia’s tallest man, Kewal Shiels, to test the new tall tees and they report positive feedback, generally from taller guys that usually struggled or had given up finding fashionable longer length clothing. Despite the serious mission, they've managed to combine some serious tall sportswear with a little bit of subversive fun in the form of a discrete giraffe logo.


The core of the Plus 2 Range is Tall Tees and Hoodies. A Large T shirt is 34.8 inches long, which is significantly longer than many standard "tall" sizes, and the Large size Hoodie is 35.8 inches. Standard price for the T shirt of $25 Australian dollars ($18 US dollars when I checked) and $80 - $100 for a hoodie is not cheap but these are solid, heavyweight cotton pieces that should last you a long time . . . possibly more cost effective than buying a couple of cheap or badly fitting T shirts that you have to replace within months! There are also typically some reductions for buying multiple items that bring the cost down. Unless you're down in Australia, you'll also need to check shipping costs carefully, which are noted on checkout.


Best wishes to Steve and Josh as they expand their offering to tall men. Don't forget to check it out to see if there is anything there for you!


Header banner for this post (C) Plus 2 Clothing.

Thursday, September 10, 2015

Back to School -- First Patternmaking Class!


I went back to school yesterday!

Actually, yesterday was our second class; I'd missed the first one as I was on vacation.  I nearly didn't get into Patternmaking at FIT at all because by the time I tried to register, all three sections of the class were full (they're each limited to 18 students) and for some reason they weren't maintaining waiting lists.  From Provincetown I managed to get someone in the department to find out if any of the professors would be willing to take one more student.  Fortunately for me, someone was: Professor Tamanaha.

I owned most of the supplies we'll be using already, with the exception of an L-shaped ruler, which I picked up locally on Tuesday.  The supply list includes muslin, pencils, rulers, pins, tape -- about what you'd expect.  I'm one of only two guys in the class; the rest are women.  There are a few people around my age in the class but most seem to be undergraduates or maybe just a little older than that.

The room is full of Alva body forms and each student will choose a form to work with over the semester (or so it seems).  I think most of the first class was focused on how to take the necessary measurements of the body form; luckily I was familiar with most of these measurements already.  We were given handouts on what to measure and then how to use the measurements to draft a basic sleeveless front and back bodice to fit the body form we'd chosen.


We spent most of the 3-1/2 hour class drafting, with the professor first demonstrating at the blackboard, and then all of us students working on our own.  The time flew by, though by 10 pm I was pretty fried.  I like the professor a lot -- very clear and also helpful.

Our only assignment is to complete our bodice drafts but since I finished mine in class, I'm basically homework free.  (If there's time it might be fun to draft for the body form I have at home too.)

I really enjoy all the measuring, calculating, and drafting: I find it very satisfying.  I've already done some drafting, albeit using a different formula than the one being taught in this class, and that helps tremendously.   (Clearly there are a number of different formulas people use to draft bodices, maybe with the same results and maybe not.)  So that was class #1!

Meanwhile I've been busy working on another shirt muslin (below), which I'm making entirely on my Elna Grasshopper.  I love sewing with it, though I'm not used to working on a free arm: I may consider setting up the table using the metal carrying case after all -- we'll see. 


And that's it!

Anyone ever taken a patternmaking class out there? If so, how was it?

Have a great day, everybody!

Tuesday, September 8, 2015

Say Hello to My New Elna Grasshopper!


Readers, this has been a good week for me sewing machine-wise and it's only Tuesday!

As you know, on Sunday, I picked up a lovely Singer 15-30 from 1910 at the Chelsea Flea Market.  Her new belt should be delivered later this week and I'm excited to start sewing with her. 

Today my Elna Grasshopper arrived.  I wasn't expecting her until tomorrow, so you can imagine how excited I was when I saw this message:


She arrived relatively well-boxed, with lots of bubble wrap and styrofoam so she didn't knock around too much in transit.


You probably already know that the Grasshopper's case converts to a sewing table (you can see how this looks with my first Elna Grasshopper here.)  I don't expect to ever use the table, but it's a clever feature nonetheless.  I believe this machine was originally designed in Spain during the Spanish Civil War and was meant to be carried into battle -- or did I dream that?  Somebody fact check please!


My machine is dated 5-51, i.e., May, 1951.  Impressive!

I oiled her liberally at all her oiling points.  All in all she's in good shape though, unlike my other Elna, she's missing her accessories box and the (often lost) speed reduction gear.  A complete machine is nice but as far as my actual sewing needs go, they're just that much more clutter. 


Best of all -- and this relates to the reason I sold the other one -- her longest stitch length is nice and long.  Not as long as the longest stitch on my vintage Singers perhaps, but long enough.  My other Grasshopper could only manage a very small stitch no matter what I did -- and I tried everything I knew of at the time -- so I never wanted to sew with it.  This Grasshopper stitches beautifully.


You can hear the motor and see her run on Instagram here and here.  (Do those links work if you're not an Instagram member?  Hope so.)

In other news, I've also been busy sewing, finishing up a shirt I started before vacation.  Love how it's turning out.


My patternmaking class starts tomorrow evening, so I'm very excited about that.  What shall I wear?

And that's it -- time to go play with my little Grasshopper.

Have a great day, everybody!

Mom's impressed.