Last night's class was devoted primarily to closing up the sides of our shirt.
We were instructed to do this using a method identical to the one we used to attach the sleeve. With the shirt right-side up we fold a 1/4" seam allowance on the back and back sleeve edges, we stitch at the fold and trim down to the stitching. Then we line up the shirt front and front sleeve edge with the trimmed raw edge and stitch at approximately 1/4" (right-sides together). OR you can line up the shirt front and front sleeve edge with the stitch line itself (which will result in a narrower seam when you fold one edge over the other).
Next, you press the seam allowance with the longer edge on top (toward the front) and topstitch it down from the right side. Again, it's exactly the same method we used to attach the sleeve to the body of the shirt, which I detailed here.
Before class started, I showed Professor B my purple gingham shirt with the welt pocket (I was wearing it), and wondered if the reason the shoulder still seemed too wide (which he agreed was the case) was because his method uses only 1/4" from the torso side, but nearly 3/4" from the sleeve side. He didn't agree and created a little three dimensional model to show me why.


He said that as long as the total seam allowance added up to 1" (regardless of how it's divided) the result will be the same.
Maybe it's me, but I still don't get how, if you take only 1/4" from the torso (aka, body) side and 3/4" from the sleeve, your shoulder seam won't end up 1/2" further down from where it would if both edges had a 1/2" seam allowance. I'm thinking he means there won't be a different in the actual fit of the shirt -- yes, that's true: whether your wider seam allowance is on the sleeve or the body side of the shirt, the sleeve length will be the same; the cuff will be in the same place. But the shoulder SEAM is going to be further down your shoulder, right? Because you're using just 1/4 from the shirt-body side.
Your eyes are glazing over so I'll move on. I asked Professor B. if I could use a commercial shirt pattern of my choosing to make my final shirt for class, and he said that as long as I use the techniques we've learned in class, it's fine with him. So I think that's what I'm going to do, rather than keep tinkering with the size Small pattern he had me trace that is still too full on me (for my taste). He did compliment me on my double-welt pocket, btw!
Privately, Professor B. showed me how to make both a covered front button placket and an attached placket (The dickey, you'll recall, had a simple turnback placket).


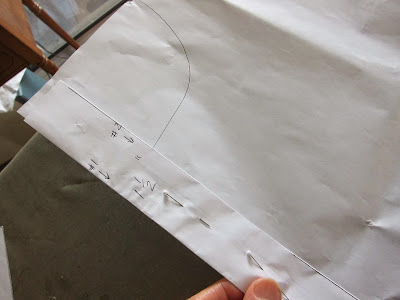
Nothing complicated about these plackets as long as you know the measurements to use. They both result in a front left placket that's 1 1/2" wide. I'll likely demonstrate these the next time I make a shirt, probably in the next week or so.
 |
| CF stands for Center Front; the measurements to the left are the extensions added to create a covered placket. |
Finally, as a bit of extra enrichment for everyone, Professor B. taught us how to prick stitch a collar edge and cuff by hand, instead of topstitching by machine. We're not required to do this, but he thinks it's a nice touch (It's usually seen on better jacket lapels.). He modeled a Canali shirt with a prick-stitched collar. It's not a look I love but it certainly looks more hand-worked, i.e., expensive. (Canali shirts seem to go for a minimum of a few hundred dollars each.)
And that's it. Next week we're off for spring break, then we'll attach our cuffs and hem our shirts. Maybe in the meantime I'll make another shirt -- with a lace overlay!

Have a great day, everybody!
No comments:
Post a Comment